This in-depth tutorial covers the installation process for the most popular Linux distributions: Ubuntu/Debian (Debian-based family) and CentOS/AlmaLinux (RHEL-based family). Step-by-step, with screenshots, tips, and troubleshooting advice.
Why Different Instructions?
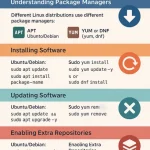
Although all Linux distributions share the same Linux kernel, their installers, package managers, and partitioning defaults differ. Ubuntu/Debian uses apt and a user-friendly installer, while CentOS/AlmaLinux uses dnf/yum and the Anaconda installer.
Requirements
- USB drive (8 GB or more)
- ISO image of Ubuntu, Debian, CentOS, or AlmaLinux
- Rufus (Windows) or balenaEtcher (Mac/Linux/Windows) to create bootable USB
- Internet connection for updates (optional, but recommended)
Step 1: Download the ISO
- Ubuntu: ubuntu.com/download
- Debian: debian.org/distrib
- CentOS Stream: centos.org/download
- AlmaLinux: almalinux.org/download
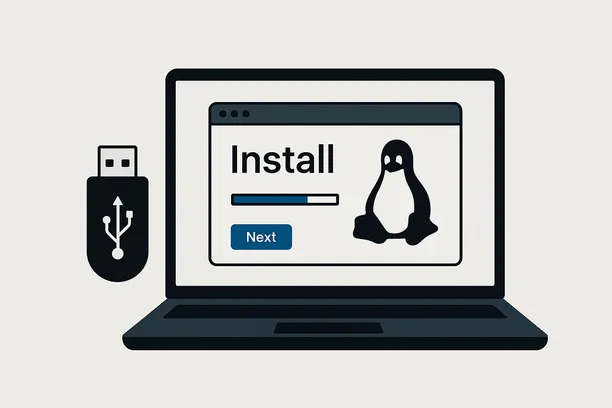
Step 2: Create a Bootable USB
Use Rufus on Windows or balenaEtcher on any OS. Select the ISO, choose your USB drive, and click Start (Rufus) or Flash (Etcher).
Step 3: Boot From USB
Restart your PC, press F12 / Esc / Del (depends on your motherboard), and select your USB drive.
Option 1: Install Ubuntu/Debian
Both Ubuntu and Debian use a relatively simple installer.
- Choose language and keyboard layout.
- Network setup: usually auto-detected. Configure Wi-Fi if needed.
- Partitioning:
- Erase disk – simplest method, creates ext4 root + swap.
- Manual – recommended for dual-boot. Example:
/root partition (20–50 GB, ext4)/home(rest of space, ext4)swap(same size as RAM, optional if using SSD)
- User account setup – choose username/password.
- GRUB bootloader – installed automatically.
First Steps After Ubuntu/Debian Install
# Update system
sudo apt update && sudo apt upgrade -y

# Install basic tools
sudo apt install build-essential curl wget git -y

# Enable firewall
sudo ufw enable
Option 2: Install CentOS/AlmaLinux
CentOS and AlmaLinux use the Anaconda installer, slightly more complex but very powerful.
- Language & Keyboard: select preferred.
- Installation Destination:
- Choose your hard disk.
- Click Custom partitioning if dual-booting.
- Typical setup:
/boot(1 GB, ext4)/(20–50 GB, xfs or ext4)/home(rest of disk, xfs or ext4)swap(equal to RAM)
- Network & Hostname – enable network and set hostname.
- Software Selection:
- Server with GUI – for beginners.
- Minimal Install – command line only.
- Root Password + User: set strong passwords.
- Begin Installation: takes 10–20 minutes.
First Steps After CentOS/AlmaLinux Install
# Update system
sudo dnf upgrade -y

# Install basic tools
sudo dnf install wget curl git vim -y

# Enable firewall
sudo systemctl enable --now firewalld
Troubleshooting
- No Wi-Fi? Some drivers require proprietary firmware. Connect with Ethernet and run updates.
- UEFI vs Legacy: use UEFI for modern systems, disable Secure Boot if needed.
- Dual Boot Issues: if Windows doesn’t appear, run
sudo update-grub(Ubuntu/Debian) after install.